#unity/日常积累
Task并行库(就是你用Task这个东西的相关库,全名Task Parallel Library,简称TPL)是基于Task这个概念的,它代表了一个并行操作。也确实,如果你对一个不玩编程的人说某个线程xxx,人家可能听不懂,线程明显是个专业术语嘛;如果说任务,是不是感觉更贴近现实了呢。
某种程度上来说,一个task类似于thread(线程)或者ThreadPool工作项(线程池的一项嘛,还是线程),但是它处在一个更高的抽象层面上(毕竟本质上还是线程嘛?大概吧)。
接着,文档还亲民地解释了一下,“并行任务”这个术语指的是一个或者多个独立的任务同时进行。
Task提供了两点基本的好处:
更效率且更灵活的使用系统资源。
在背后呢(通常说在底层实现上),任务是排在线程池当中的,并且它用了一些算法(决策、调整线程数量和提供了负载均衡以加大吞吐量)进行增强。这使得任务相对轻量级,你可以创建许多任务使得并行操作更精细化。
相比使用线程或者线程池,有更多的程序模块可以使用。
任务和平台框架(指.NET这个平台吧)提供了丰富的API支持waiting, cancellation, continuations, robust exception handling, detailed status, custom scheduling等功能。
因此,对于在.NET上使用多线程、异步操作和并行代码的你来说,TPL是更好的API(也就是说,在.NET下,微软非常建议你使用Task)。
看完这一段,很明显感觉到微软在说它好用,但是底层实现上是一笔带过的,就讲了它底层是用了线程池那一套的,并且有所优化(我开始有点理解,为什么大家都说,微软的东西好入门,但是难深入了。因为确实好用易上手,但是细节屏蔽太多了)。
显示地创建并运行一个任务
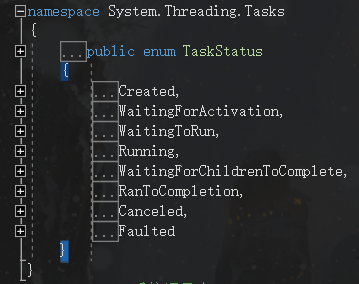
用System.Threading.Tasks.Task类表示的任务不会返回值。用System.Threading.Tasks.Task的任务会返回一个值,它继承自Task类。task对象处理基本的底层细节并提供了在任务生命周期内可由调用线程访问的方法和属性。例如,你可以在任意时刻访问任务的状态(Status)属性,以确定它是否在运行、是否运行完成、是否被取消或者是否抛出了异常。TaskStatus枚举描述了各种状态。
Task常规使用
当你创建一个任务时,你给它一个用户委托,该委托内封装了任务要执行的代码。这个委托可以是一个有命名的委托也可以是匿名的,还可以是lambda表达式。lambda表达式可以包含命名方法的调用,在下面的例子中予以展示。注意这个例子包含了一个Task.Wait方法的调用,用以确保任务在控制台模式结束前完成执行。
 1
 2
 3
 4
 5
 6
 7
 8
 9
10
11
12
13
14
15
16
17
18
19
20
21
22
23
24
|
using System;
using System.Threading;
using System.Threading.Tasks;

public class Example
{
   public static void Main()
   {
      Thread.CurrentThread.Name = "Main";

      // Create a task and supply a user delegate by using a lambda expression.
      Task taskA = new Task( () => Console.WriteLine("Hello from taskA."));
      // Start the task.
      taskA.Start();

      // Output a message from the calling thread.
      Console.WriteLine("Hello from thread '{0}'.",
                        Thread.CurrentThread.Name);
      taskA.Wait();
   }
}
// The example displays output like the following:
//       Hello from thread 'Main'.
//       Hello from taskA.
|
Task.Run()
你也可以使用Task.Run来一次性创建并启动一个任务。为了管理这个任务,Run方法使用了默认的任务调度器,无论这个任务调度器是否与当前线程相关。当你不需要对任务的创建和调度进行太多控制时,Run方法是更适用一些。(明显相对于上面的方式,Run将创建和启动合并为一步了)
1
|
Task taskA = Task.Run(() => Console.WriteLine("Hello from taskA."));
|
Task.Factory.StartNew()
你还可以使用TaskFactory.StartNew来一次性创建并启动一个任务。当创建和调度不必分离并且你需要额外的任务创建配置项或者使用特定的调度器,又或者你需要传递额外的状态到任务(你可以通过Task.AsyncState属性回收 )中时,你可以使用TaskFactory.StartNew方法。下面是一个例子:
 1
 2
 3
 4
 5
 6
 7
 8
 9
10
11
12
13
14
15
16
17
18
19
20
21
22
23
24
25
26
27
28
29
30
31
32
33
34
35
36
37
38
39
40
41
42
43
44
45
46
47
|
using System;
using System.Threading;
using System.Threading.Tasks;

class CustomData
{
	public long CreationTime;
	public int Name;
	public int ThreadNum;
}

public class Example
{
	public static void Main()
	{
		Task[] taskArray = new Task[10];
		for (int i = 0; i < taskArray.Length; i++)
		{
			taskArray[i] = Task.Factory.StartNew((object obj) => {
				CustomData data = obj as CustomData;
				if (data == null)
					return;
				data.ThreadNum = Thread.CurrentThread.ManagedThreadId;
			},
			new CustomData(){Name = i, CreationTime = DateTime.Now.Ticks});
		}
		Task.WaitAll(taskArray);
		foreach(var task in taskArray)
		{
			var data = task.AsyncState as CustomData;
			if (data != null)
				Console.WriteLine("Task #{0} created at {1}, ran on thread #{2}.",
                              data.Name, data.CreationTime, data.ThreadNum);
		}
	}
}
// The example displays output like the following:
//       Task #0 created at 635116412924597583 on thread #3.
//       Task #1 created at 635116412924607584 on thread #4.
//       Task #3 created at 635116412924607584 on thread #4.
//       Task #4 created at 635116412924607584 on thread #4.
//       Task #2 created at 635116412924607584 on thread #3.
//       Task #6 created at 635116412924607584 on thread #3.
//       Task #5 created at 635116412924607584 on thread #4.
//       Task #8 created at 635116412924607584 on thread #4.
//       Task #7 created at 635116412924607584 on thread #3.
//       Task #9 created at 635116412924607584 on thread #4.
|
带有返回值的Task< TResult >
Task和Task< TResult >都暴露了一个静态的Factory属性,该属性返回一个默认的TaskFactory实例,以便调用Task.Factory.StartNew()方法。同样,在下面的例子中,因为任务都是 System.Threading.Tasks.Task< TResult >类型的,它们都有一个 Task< TResult >.Result属性,该属性包含了运算的结果。任务是异步运行的,可能以任意时序执行完。若Result属性在运行结束前被访问,这个属性会阻塞调用线程直到该值可访问。
 1
 2
 3
 4
 5
 6
 7
 8
 9
10
11
12
13
14
15
16
17
18
19
20
21
22
23
24
25
26
27
28
29
30
31
32
33
34
|
using System;
using System.Threading.Tasks;

public class Example
{
   public static void Main()
   {
        Task<Double>[] taskArray = { Task<Double>.Factory.StartNew(() => DoComputation(1.0)),
                                     Task<Double>.Factory.StartNew(() => DoComputation(100.0)),
                                     Task<Double>.Factory.StartNew(() => DoComputation(1000.0)) };

        var results = new Double[taskArray.Length];
        Double sum = 0;

        for (int i = 0; i < taskArray.Length; i++) {
            results[i] = taskArray[i].Result;
            Console.Write("{0:N1} {1}", results[i],
                              i == taskArray.Length - 1 ? "= " : "+ ");
            sum += results[i];
        }
        Console.WriteLine("{0:N1}", sum);
   }

   private static Double DoComputation(Double start)
   {
      Double sum = 0;
      for (var value = start; value <= start + 10; value += .1)
         sum += value;

      return sum;
   }
}
// The example displays the following output:
//        606.0 + 10,605.0 + 100,495.0 = 111,706.0
|
结合lambda使用时出现的特殊情况
当你使用lambda表达式创建一个委托时,你有权限访问在你源代码中此时可见的的所有变量。可是,在某些情况下,尤其是在循环中,一个lambda表达式无法如期捕获变量。它仅仅捕获了变量的引用,而不是每次迭代后发生变化的值(试着解释一下,任务的创建&启动需要时间大于循环执行完的事件,又因为任务委托中取得的是i的引用,所以委托真正执行时,循环已经执行完,引用去取出来的值都是最后的值了)。下面的例子说明了这个问题。它传递了一个循环计数器(int i)给lambda表达式,该表达式实例化了一个CustomData对象并使用了这个循环计数器作为对象的标识符。正如样例的输出展示的那样,每个CustomData对象都有完全一样的标识符,但这并不是你所期望的。
 1
 2
 3
 4
 5
 6
 7
 8
 9
10
11
12
13
14
15
16
17
18
19
20
21
22
23
24
25
26
27
28
29
30
31
32
33
34
35
36
37
38
39
40
|
using System;
using System.Threading;
using System.Threading.Tasks;

class CustomData
{
   public long CreationTime;
   public int Name;
   public int ThreadNum;
}
public class Example
{
   public static void Main()
   {
      // Create the task object by using an Action(Of Object) to pass in the loop
      // counter. This produces an unexpected result.
      Task[] taskArray = new Task[10];
      for (int i = 0; i < taskArray.Length; i++)
      {
         taskArray[i] = Task.Factory.StartNew( (Object obj) => {
         	var data = new CustomData() {Name = i, CreationTime = DateTime.Now.Ticks};
            data.ThreadNum = Thread.CurrentThread.ManagedThreadId;
            Console.WriteLine("Task #{0} created at {1} on thread #{2}.",
            	data.Name, data.CreationTime, data.ThreadNum);
         }, i);
      }
      Task.WaitAll(taskArray);
   }
}
// The example displays output like the following:
//       Task #10 created at 635116418427727841 on thread #4.
//       Task #10 created at 635116418427737842 on thread #4.
//       Task #10 created at 635116418427737842 on thread #4.
//       Task #10 created at 635116418427737842 on thread #4.
//       Task #10 created at 635116418427737842 on thread #4.
//       Task #10 created at 635116418427737842 on thread #4.
//       Task #10 created at 635116418427727841 on thread #3.
//       Task #10 created at 635116418427747843 on thread #3.
//       Task #10 created at 635116418427747843 on thread #3.
//       Task #10 created at 635116418427737842 on thread #4.
|
在每次迭代时,你可以通过给任务的构造函数提供一个状态对象访问这该值。下面的样例程序通过在创建CustomData对象时使用循环计数器来修改了前面的例子,而CustomData对象又被传给了lambda表达式。正如样例输出的那样,现在每个CustomData对象都有唯一的基于循环计数器的标识符了。
 1
 2
 3
 4
 5
 6
 7
 8
 9
10
11
12
13
14
15
16
17
18
19
20
21
22
23
24
25
26
27
28
29
30
31
32
33
34
35
36
37
38
39
40
41
42
43
|
using System;
using System.Threading;
using System.Threading.Tasks;

class CustomData
{
   public long CreationTime;
   public int Name;
   public int ThreadNum;
}
public class Example
{
   public static void Main()
   {
      // Create the task object by using an Action(Of Object) to pass in custom data
      // to the Task constructor. This is useful when you need to capture outer variables
      // from within a loop.
      Task[] taskArray = new Task[10];
      for (int i = 0; i < taskArray.Length; i++) {
         taskArray[i] = Task.Factory.StartNew( (Object obj ) => {
         	CustomData data = obj as CustomData;
            if (data == null)
            	return;
            data.ThreadNum = Thread.CurrentThread.ManagedThreadId;
            Console.WriteLine("Task #{0} created at {1} on thread #{2}.",
            	data.Name, data.CreationTime, data.ThreadNum);
         },
         new CustomData() {Name = i, CreationTime = DateTime.Now.Ticks} );
      }
      Task.WaitAll(taskArray);
   }
}
// The example displays output like the following:
//       Task #0 created at 635116412924597583 on thread #3.
//       Task #1 created at 635116412924607584 on thread #4.
//       Task #3 created at 635116412924607584 on thread #4.
//       Task #4 created at 635116412924607584 on thread #4.
//       Task #2 created at 635116412924607584 on thread #3.
//       Task #6 created at 635116412924607584 on thread #3.
//       Task #5 created at 635116412924607584 on thread #4.
//       Task #8 created at 635116412924607584 on thread #4.
//       Task #7 created at 635116412924607584 on thread #3.
//       Task #9 created at 635116412924607584 on thread #4.
|
该状态作为一个参数传给了任务的委托,并且它能够被任务对象用Task.AsyncState属性访问。下面示例是上一个示例的变种。它使用了AsyncState属性来显示被传入到lambda表达式中的CustomData对象的信息。
 1
 2
 3
 4
 5
 6
 7
 8
 9
10
11
12
13
14
15
16
17
18
19
20
21
22
23
24
25
26
27
28
29
30
31
32
33
34
35
36
37
38
39
40
41
42
43
44
45
|
using System;
using System.Threading;
using System.Threading.Tasks;

class CustomData
{
   public long CreationTime;
   public int Name;
   public int ThreadNum;
}
public class Example
{
   public static void Main()
   {
      Task[] taskArray = new Task[10];
      for (int i = 0; i < taskArray.Length; i++)
      {
         taskArray[i] = Task.Factory.StartNew( (Object obj ) => {
         	CustomData data = obj as CustomData;
            if (data == null)
            	return;
            data.ThreadNum = Thread.CurrentThread.ManagedThreadId;
            },
            new CustomData() {Name = i, CreationTime = DateTime.Now.Ticks} );
      }
      Task.WaitAll(taskArray);
      foreach (var task in taskArray) {
         var data = task.AsyncState as CustomData;
         if (data != null)
            Console.WriteLine("Task #{0} created at {1}, ran on thread #{2}.",
                              data.Name, data.CreationTime, data.ThreadNum);
      }
   }
}
// The example displays output like the following:
//       Task #0 created at 635116412924597583 on thread #3.
//       Task #1 created at 635116412924607584 on thread #4.
//       Task #3 created at 635116412924607584 on thread #4.
//       Task #4 created at 635116412924607584 on thread #4.
//       Task #2 created at 635116412924607584 on thread #3.
//       Task #6 created at 635116412924607584 on thread #3.
//       Task #5 created at 635116412924607584 on thread #4.
//       Task #8 created at 635116412924607584 on thread #4.
//       Task #7 created at 635116412924607584 on thread #3.
//       Task #9 created at 635116412924607584 on thread #4.
|
三、总结
归纳一下,task的几个特点:
底层是在线程池中运作的,且微软用了一些增强性能的算法(这点使你在大部分场景中可以无忧地使用它)
实际使用往往会结合lambda表达式,正如网上搜到的那样 task(()=>{Your code}))
结合lambda表达式在循环中使用计数器时,需要注意lambda内使用计数器是其引用。可以使用自定义传参给任务来回避这种情况。
看了以上几个例子后,对task有个大致的了解,并且基本使用应该是没有太大问题了。但是文档往下翻,还有许多详细参数,细节方面的问题。必要时进行深入学习。